As you probably know there are hundreds of different posts about building Infrastructure as Code using Terraform, but this details some of my experience when coupled with AWS.
The main aim of this demonstration is to stand up a single AWS EC2 instance, ready for logging into on its public IP, using Terraform. As a pre-requisite to this I need several things…
- An AWS account
- A Terraform installation
- A permissioned IAM user and key-pair
The AWS account is easy, go and sign up and get free tier access, as this is invaluable in exploring AWS and learning by getting a hands-on feel for how things work and fit together.
For the Terraform installation, I used my trusty RPi4 4GB workhorse running the 64-bit version of the Raspberry Pi OS. So I downloaded the ARM64 version for Linux from the Hashicorp website. Unpon extracting I was surprised (pleasently) to find a single binary, with no need for installation or dependencies.
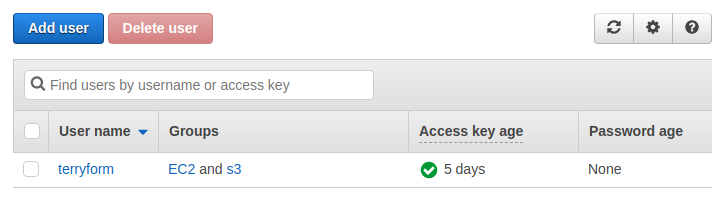
I created a seperate IAM user through the AWS console, ensuring to save the ACCESS KEY and SECRET KEY, as well as the ssh key pair file. Although I could have been more granular with the permissions I gave this user full access to EC2 and S3.

With all the pre-requisites in place I could start building up my desired Infrastructure as Code.
I first added the AWS ACCESS and SECRET keys as OS environment variables:

In the same directory I extracted the terraform binary I created a main.tf file using vi. This file tells Terraform what environments it will be integrating with and what it will be provisioning.
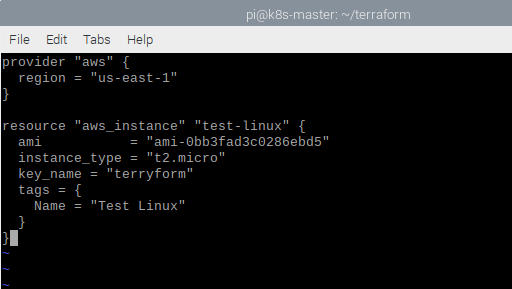
The beauty of Terraform is that it is so simple to get started and understand what its doing, going through the items in the main.tf file we have:
provider: Obviously which environment we will be provisioning in, here we will be using AWS, and the US-East-1 region.
resource: An infrastructure element to deploy, containing a number of different parameters.
ami: Which Amazon Machine Image to use
instance type: Predefined Virtual machine sizing template
key_name: The ssh key pair we created when setting up the IAM user
tags: some distinguishing identification
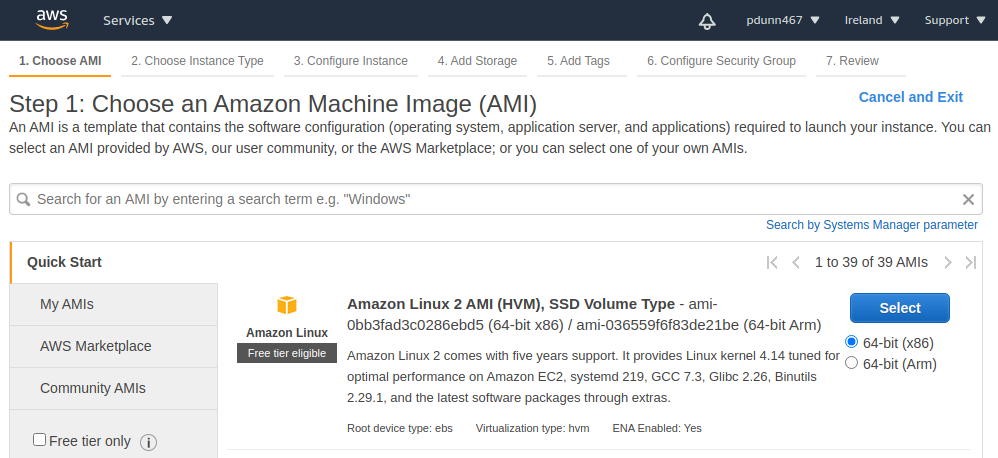
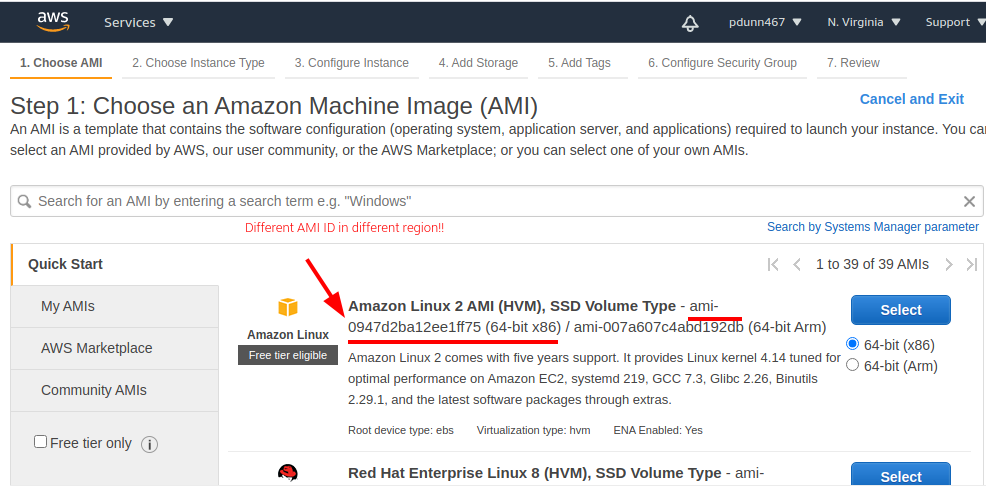
To get the AMI id I needed to look in the AWS console and start the process of launching an instance, this then gives a list of all available AMI’s to choose from along with the id.
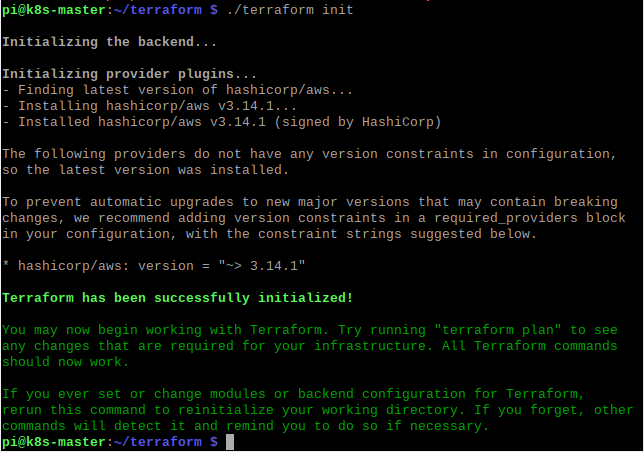
With the main.tf file in place, the command terraform init is used to download the module relevant to the environment you will be deploying too.
The next step is to run a terraform plan which doesn’t actually do anything it just tells you what it will do.

Assuming you are happy you can run the terraform apply command to actually start the deployment, which prompts for verification.
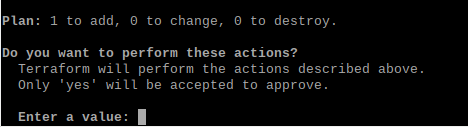
Oh no, an error! Thankfully the error is detailed in plain english and shows you where to look.

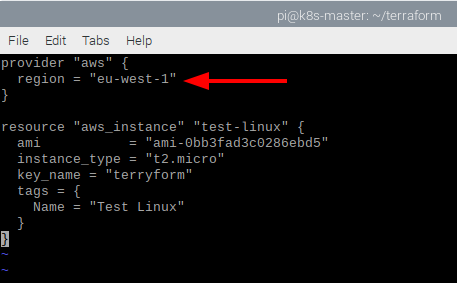
The eagle-eyed among you may have seen that I chose US-East-1 as my AWS region for provisioning, however AMI id’s differ between regions, and the id I used was from my default region EU-West-1 (Ireland).
Back into the main.tf file, I simply change the region to be eu-west-1. Obviously I could have also changed the AMI ID to be the one from US-East-1 if I specifically wanted to deploy to that region.
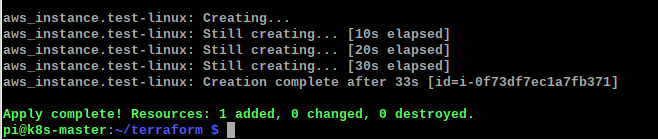
I run the terraform apply again and this time it goes through successfully
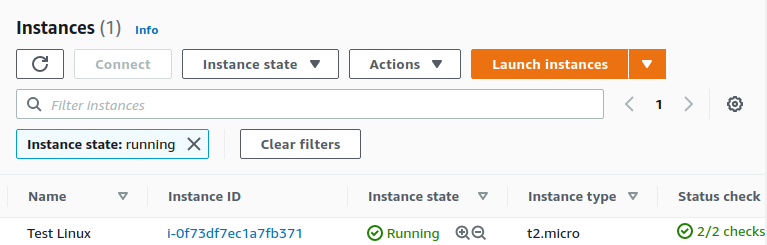
This can also be seen through the AWS console, as a new running instance
I now have a Linux VM running in the cloud, but I want to connect to it and use it. By default AWS does not permit inbound traffic over the public interface. Therefore we need to allow traffic, specifically on port 22 for SSH.
Again we can use Terraform for this, creating a new security group and assigning our instance to it. Editing the main.tf file again we add a new resource element.
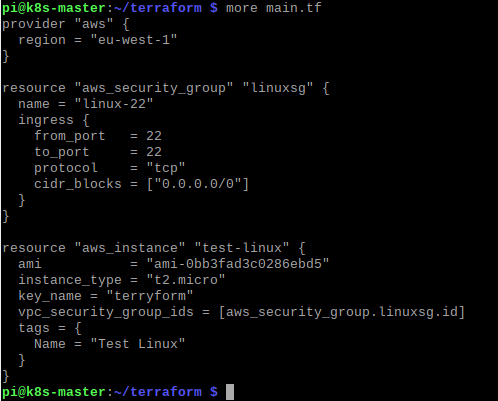
As before its pretty straightforward, a separate resource is declared, as type aws_security_group, with name of linuxsg. This opens up port 22 on all interfaces.
In order for our newly created instance to use this security group, we add an extra parameter into the aws_instance resource declaration, vpc_security_group_ids = [aws_security_group.linuxsg.id]
Running terraform apply again makes the new changes on the fly as it remembers what it has already created, only making the changes it needs too.

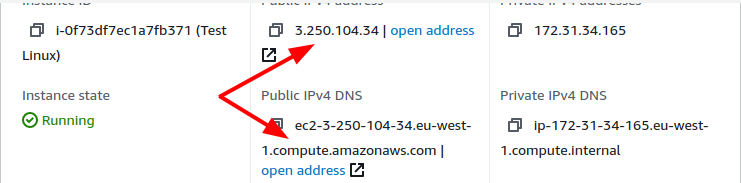
With the VM running, I cheated and got the Public IP and DNS name from the AWS console, but Terraform can output this information if needed.
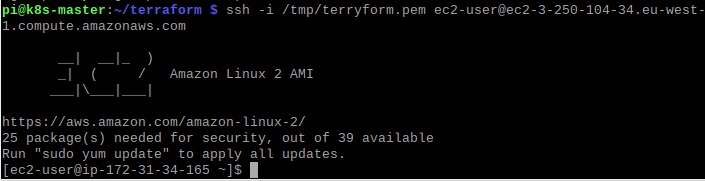
Now that port 22 is open we can use the .pem key-pair file we downloaded as part of the IAM user creation, and use it to ssh directly over the internet to the running VM.
When you are finished with the deployed resources, a single terraform destroy command will tidy up and terminate all the resources it built as part of the deployment.
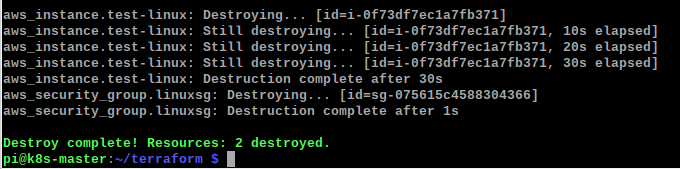
This can also be seen in the AWS console…

Its really as simple as that. Obviously Terraform can be used in far more complicated scenarios, but this gives you a taste of how easy it is to stand up whole environments very easily or on demand when needed for a specific purpose or DR invocation.